Run your First Chaos Workflow in 5 minutes
Welcome to this scenario, in this section you will get an overview of how to execute a sample Litmus Workflow on your application to induce Chaos as well as to observe the results and resilience score.
Prerequisites#
Before starting with your first Chaos Workflow make sure the Litmus ChaosCenter is installed in either one of these scopes
Aim of the scenario#
In this scenario we will execute a pod-delete fault on a sample micro-service application called Podtato Head. This scenario will help you
- Install and execute a pod-delete fault on the Podtato Head Application
- Visualize and analyze the chaos experiment
Schedule your First Workflow#
Select the podtato-head predefined workflow#
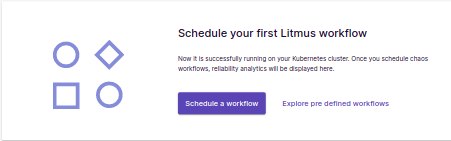
- Click on Schedule a Workflow from the ChaosCenter Homepage or from the top right button in the Litmus Workflows tab.

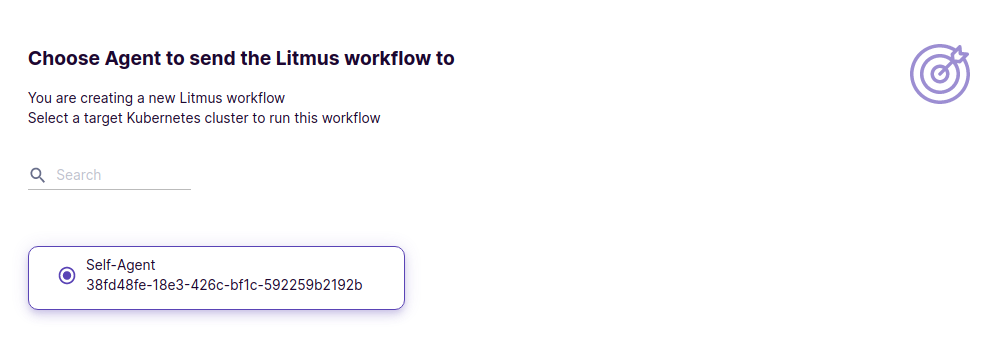
Select Self Agent as the target ChaosAgent for Chaos Injection. This is where we'll select which ChaosAgent to choose as the Target Agent.
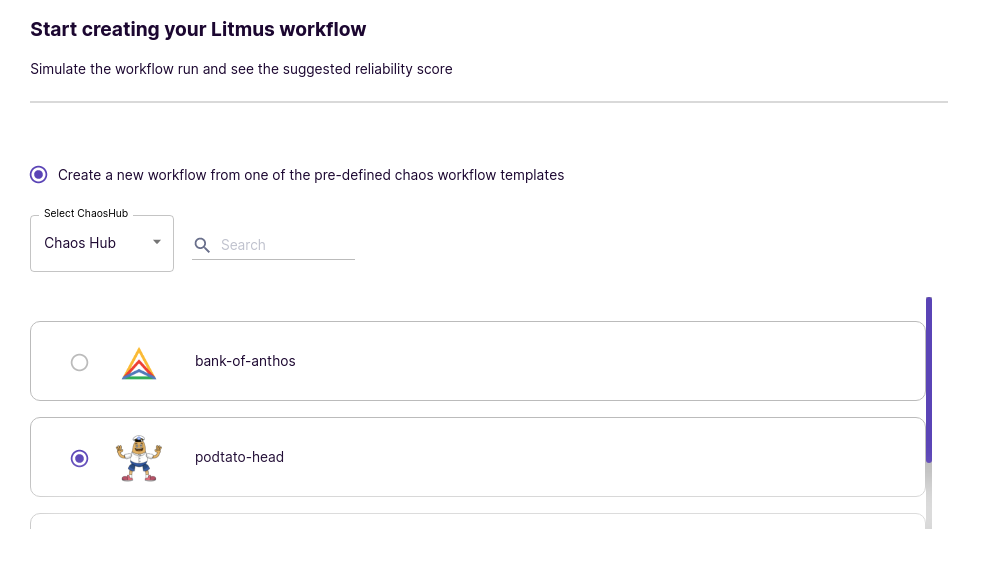
Expand the first radio button (To create a new workflow from Predefined Workflow Templates) and select podtato-head from the list of Predefined Workflows.
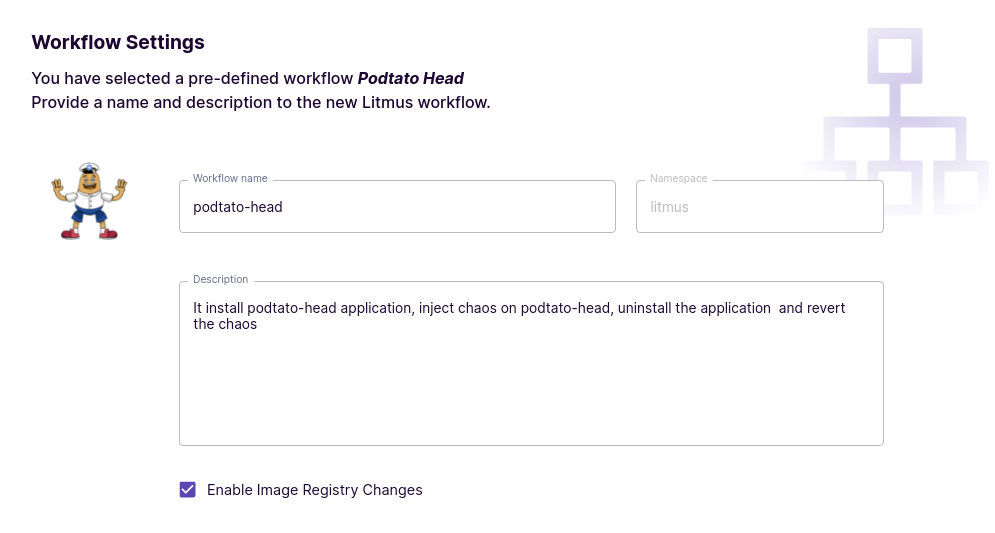
View the workflow details in the Workflow Settings, you can modify the name and description of the workflow to suit your needs.
Simulate the Workflow Steps Visualization#
View the visualization of the Litmus Workflow you are about to execute. This step also allows for you to edit or modify the YAML/tunable if required. We would just stick with the default configurations for now.
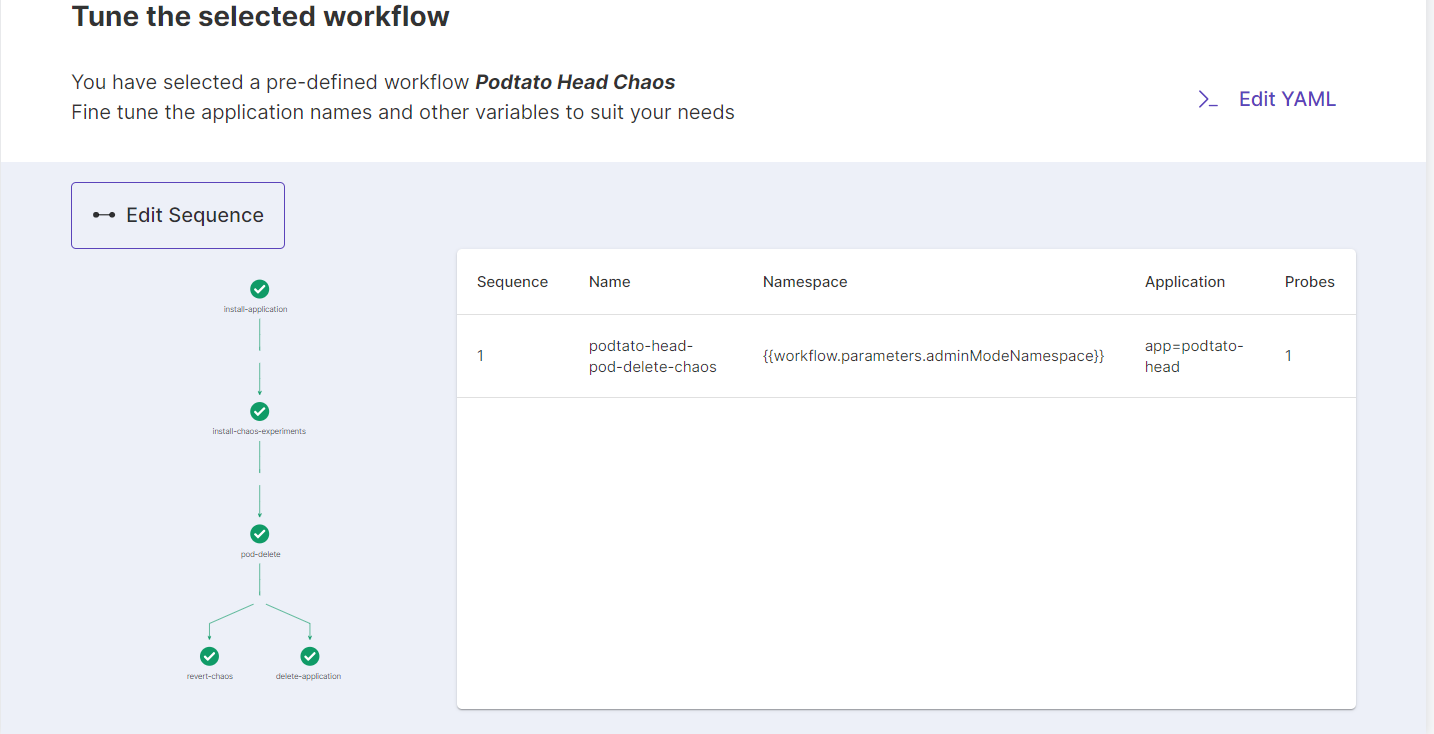
By default in the Podtato Head Workflow Template the steps to gracefully delete the Chaos Resources (
revert-chaos) and also the Podtato Head application (delete-application) are present.
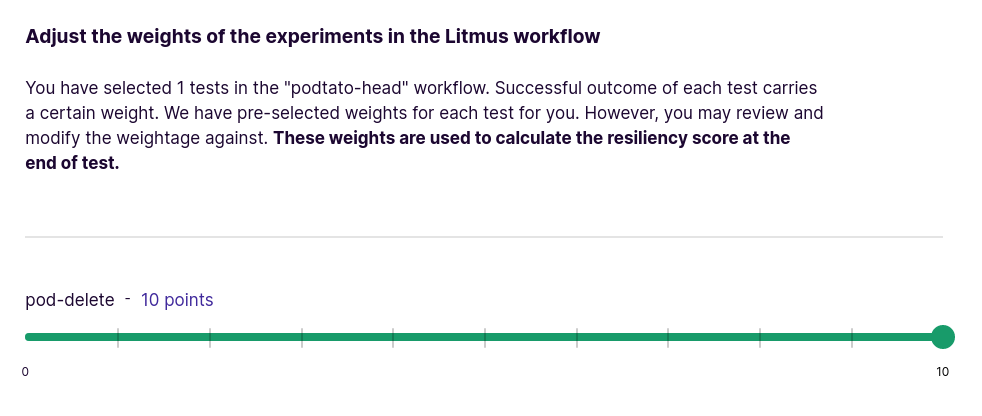
Assign Weights to the Workflow Experiments#
Assign weights to the chaos experiments that are part of the workflow using the slider. This is typically used when there are multiple experiments as part of a workflow. These weights influence the Resilience Score calculation for the chaos workflow.
Schedule the Podtato-Head Workflow#
Schedule the Litmus Workflow for immediate and one-time execution by selecting the Schedule Now option
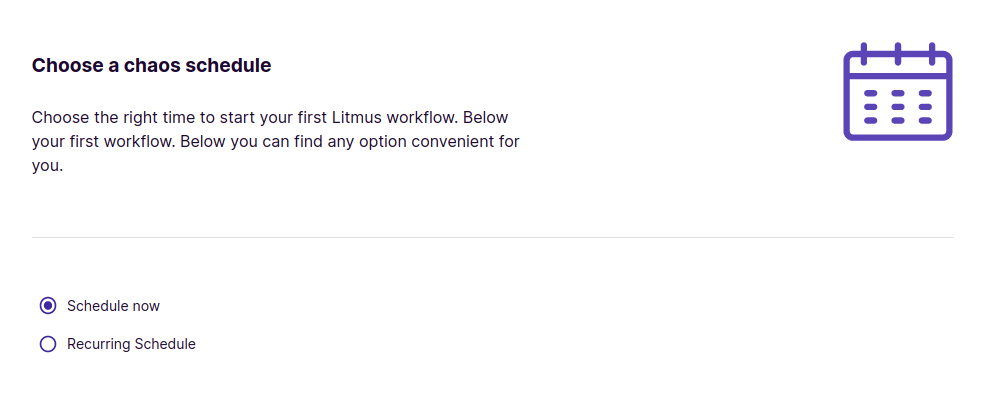
Verify and click on Finish to start the Chaos Injection

Congratulations#
And with that you have successfully scheduled your first Chaos Workflow with Litmus.

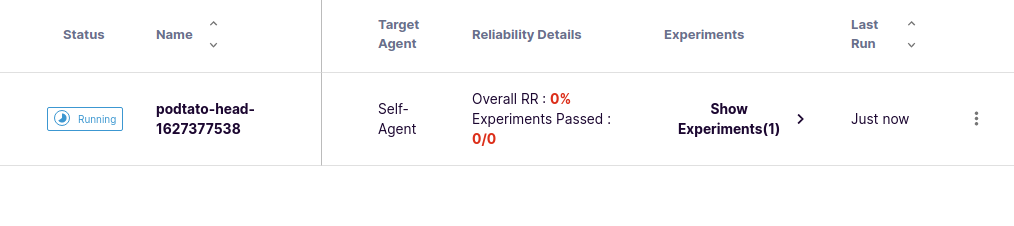
Visualize and Analyze#
To check the current progress of the Podtato-Head workflow, view the status of the Workflow from the Litmus Workflows Tab.
Litmus deploys a sample multi-replica hello-service application before going onto pull the pod-delete ChaosExperiment template. In the next step, it creates the ChaosEngine to launch the chaos injection via dedicated pods.
To see all these steps live in action on the
workflow namefrom the Runs Tab or select Show the workflow from the three dot menu.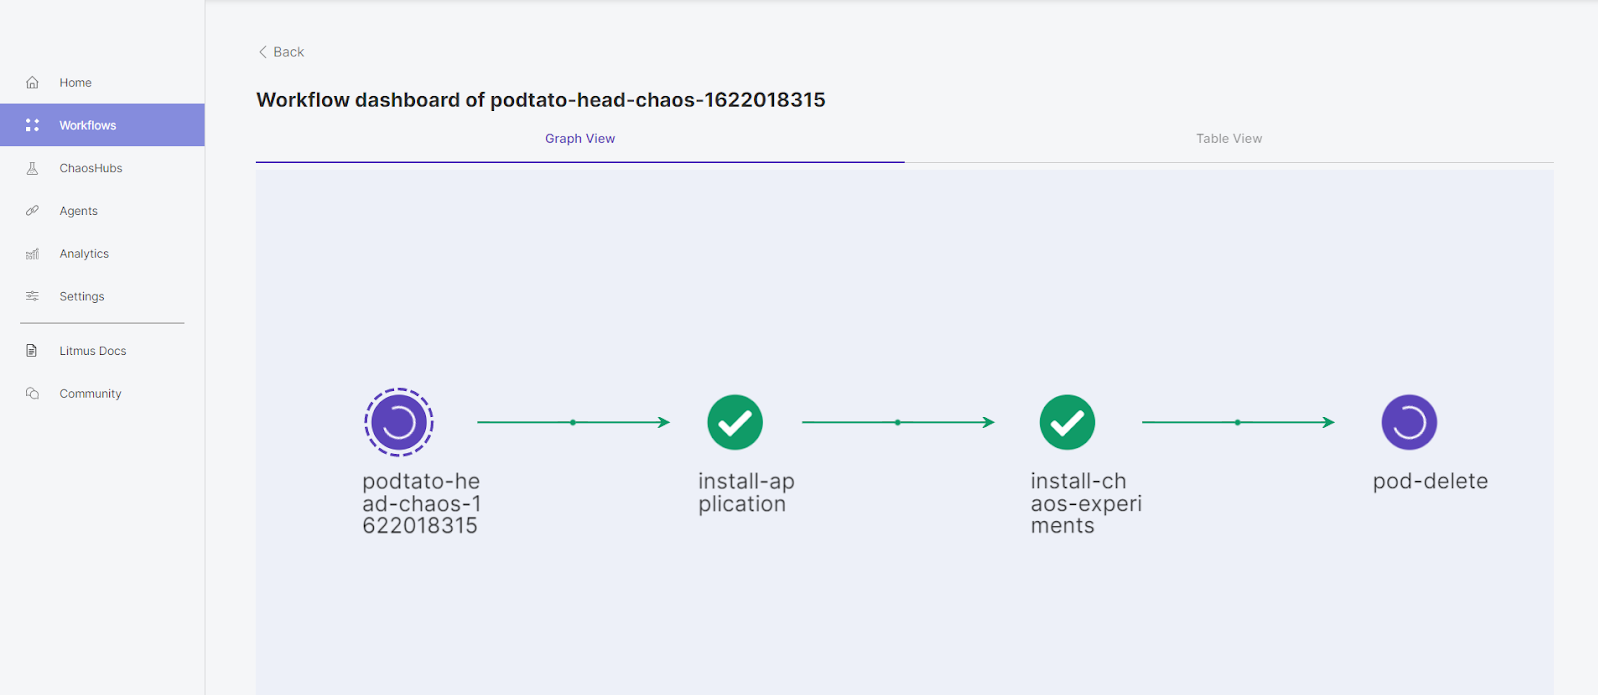
To see them in action on the terminal itself watch the pods in the namespace where ChaosCenter is installed.
In this case we would consider ChaosCenter to be installed in the
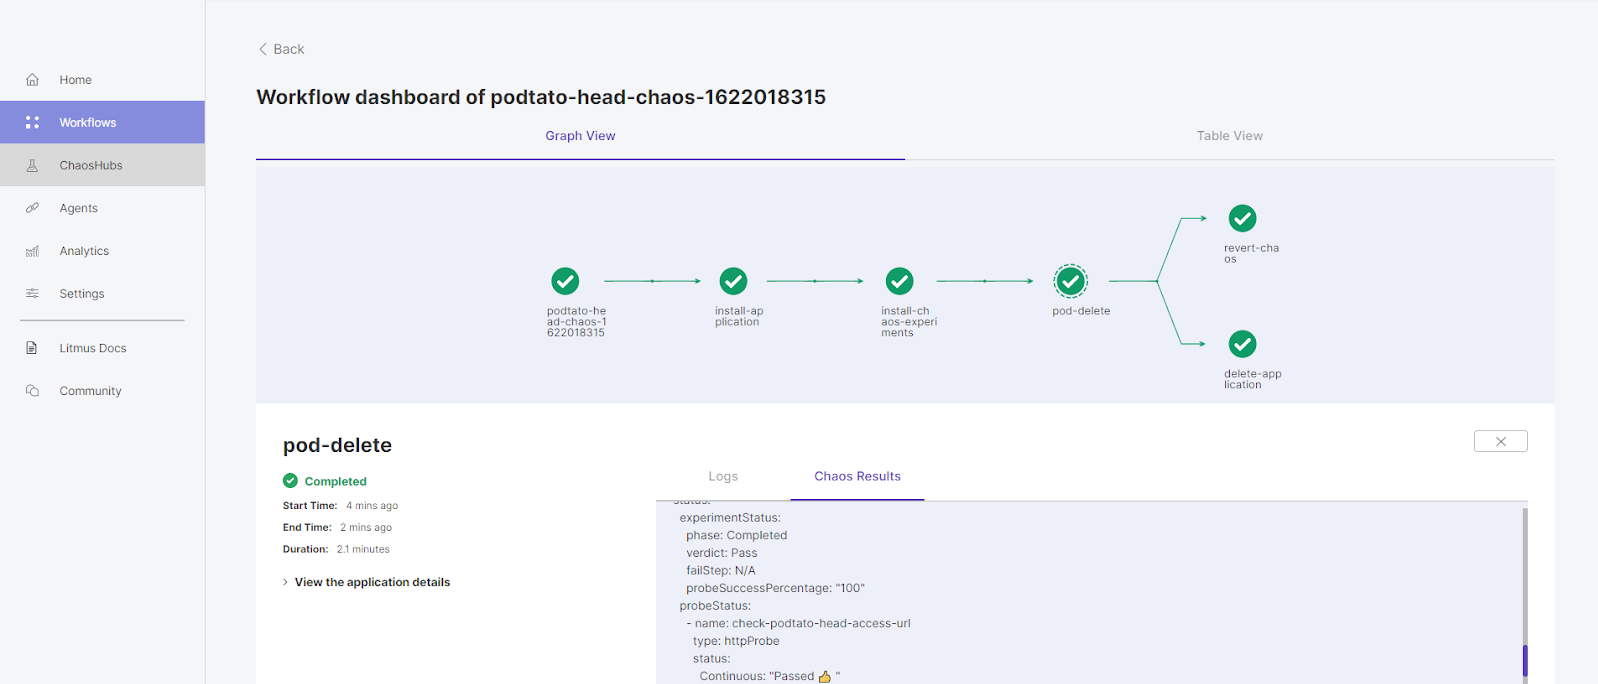
litmusnamespaceExpected Outputkubectl get pods -n litmusNAME READY STATUS RESTARTS AGEchaos-exporter-547b59d887-4dm58 1/1 Running 0 6h16mchaos-operator-ce-84ddc8f5d7-l8c6d 1/1 Running 0 6h16mevent-tracker-5bc478cbd7-xlflb 1/1 Running 0 6h16mlitmusportal-frontend-698bcb686f-xm4q5 1/1 Running 0 6h26mlitmusportal-server-5bb94f65d7-llzng 2/2 Running 1 6h26mmongo-0 1/1 Running 0 6h26mpod-delete-llu29u-vh8w9 1/1 Running 0 21spodtato-5554584d7-68bts 1/1 Running 0 94spodtato-5554584d7-cjmv6 0/1 ContainerCreating 0 2spodtato-5554584d7-z4cwl 0/1 Terminating 0 94spodtato-head-chaos-1622018315-1170130526 0/2 Completed 0 112spodtato-head-chaos-1622018315-3739956689 2/2 Running 0 31spodtato-head-chaos-1622018315-80657052 0/2 Completed 0 79spodtato-head-pod-delete-chaosx55vh-runner 1/1 Running 0 25ssubscriber-958948965-qbx29 1/1 Running 0 6h16mworkflow-controller-78fc7b6c6-w82m7 1/1 Running 0 6h16mPost Chaos Execution view the Experiment Results. Click on the pod-delete node on the graph to launch a results console. Click on the Chaos Results tab to view the details around success/failure of the steady-state hypothesis constraints (podtato-head website availability through pod deletion period) and the experiment verdict.
Resources#
Beginner Friendly Resources#
✨ Below is a list of beginner-level resources, everything you need to get started in your Cloud-Native Chaos Engineering journey ✨
List of Beginner Friendly Resources